2.2 Installation using virtual CDROM drives
There are several methods to install IRIX onto a new clean disk.
1. Use a CDROM drive and the needed set of CDs.
2. Use virtual CDROM drives and the needed set of CDs as ISO images.
3. Use a tool for network install like Reanimator, Love or Booterizer.
To install IRIX 6.5.22 the following CDs or ISO images are needed:
1. IRIX 6.5.22 Installation Tools and Overlays (1 of 3).iso
2. IRIX 6.5.22 Overlays (2 of 3).iso
3. IRIX 6.5.22 Overlays (3 of 3).iso
4. IRIX 6.5 Applications November 2003.iso
The above-mentioned ISO images as well as lots of other SGI related ISO images can be downloaded from jrra-zone.
This chapter describes the installation of IRIX 6.5.22 using a SCSI emulator.
The description and screenshots were taken from an SGI O2 having the hard disk connected to SCSI bus 0 and ID 2.
BlueSCSI was used as SCSI emulator. The BlueSCSI device is connected to the external SCSI connector of the O2 and thus the SCSI bus for all virtual CDROM drives is 1.
The boot installation media IRIX 6.5.22 Installation Tools and Overlays (1 of 3).iso is on SCSI ID 1.
The following instructions have been taken in part from sgistuff.net..
On most SGI systems the installation process can be invoked from the maintenance menu by selecting the Install System Software entry. This will boot sash and start the IRIX installer. This process will fail, if the installer cannot find a swap partition to copy the installation tools to.

To prepare your disk and do a fresh install, you will invoke at least two of the following commands, which are located on the installation media.
The first you will always need is sash, the standalone shell. From there you will start one of the other two: fx, the disk utility, or inst, the installer.
The biggest problem about sash and fx is, that you have to run different versions depending on your hardware.
The following table gives you the appropriate filenames:
Professional Iris
4D/60 ? ?
other sash.IP4 fx.IP4
Personal Iris
4D/2x sash.IP6 fx.IP6
4D/3x sash.IP12 fx.IP12
Power Series
4D/120 sash.IP5 fx.IP5
4D/210 sash.IP9 fx.IP9
other sash.IP7 fx.IP7
Crimson
all sash.IP17 fx.IP17
Indigo
R3000 sash.IP12 fx.IP12
R4x00 sashARCS fx.ARCS
Indigo 2
R4x00 sashARCS fx.ARCS
other sash64 fx.64
Indy
all sashARCS fx.ARCS
Challenge/Onyx
R4x00 sashARCS fx.ARCS
other sash64 fx.64
O2 / O2+
all sashARCS fx.ARCS
Octane / Octane 2
all sash64 fx.64
Fuel
all sash64 fx.64
Look up the appropriate entries for your system and use them whenever sashARCS or fx.ARCS is used in the examples below, which describe the installation on an O2.
Unless you are using a fresh disk from SGI you need to add a disk label and partition the drive.
Enter the Command Monitor from the PROM menu and execute the following command to load the standalone shell:
boot -f dksc(1,1,8)sashARCS

Next you can invoke the partitioning tool fx by executing the following command from the standalone shell:
dksc(1,1,7)stand/fx.ARCS -x
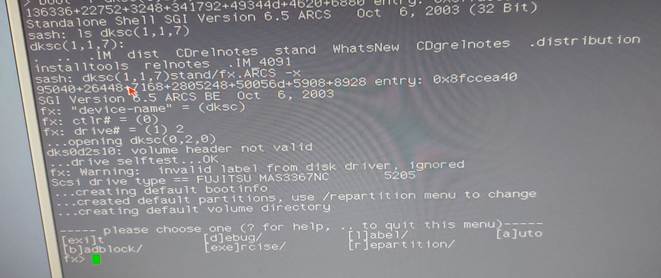
To initialize the disk, you have to repartition the drive:
· Type r to go into menu repartition.
· Type ro to partition the disk as root drive.
· Type yes at the next question regarding data on disk will be lost.
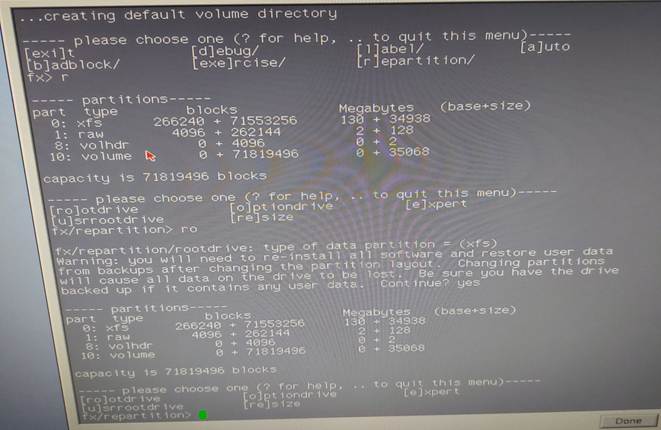
Type .. to leave the repartition menu.
Type exit to leave the partition program fx.
After leaving fx the system drops back into the PROM menu screen. To invoke the installation, you can now select the appropriate menu entry, see next chapter.
The installation using virtual CDROM drives was inspired by a post at the SGI User Group Forum.
First, I copied the following 6.5.22 installation ISO images onto the SD-Card to be used with the BlueSCSI device. I used BlueSCSI with the Centronics interface connected to an external DAT tape, see my blog entry SCSI emulation.
Note the naming of the ISO files using CDXY Name.iso for correct mapping to SCSI IDs.
CD10 IRIX 6.5.22 Installation Tools and Overlays (1 of 3).iso
CD20 IRIX 6.5.22 Overlays (2 of 3).iso
CD30 IRIX 6.5.22 Overlays (3 of 3).iso
CD40 IRIX 6.5 Applications November 2003.iso
CD50 IRIX 6.5 Foundation 1.iso
CD60 IRIX 6.5 Foundation 2.iso
CD70 ONC3 NFS Version 3.iso
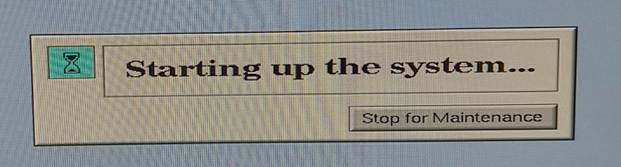
Start the SGI and press the Stop for Maintenance button to go into the Maintenance menu.
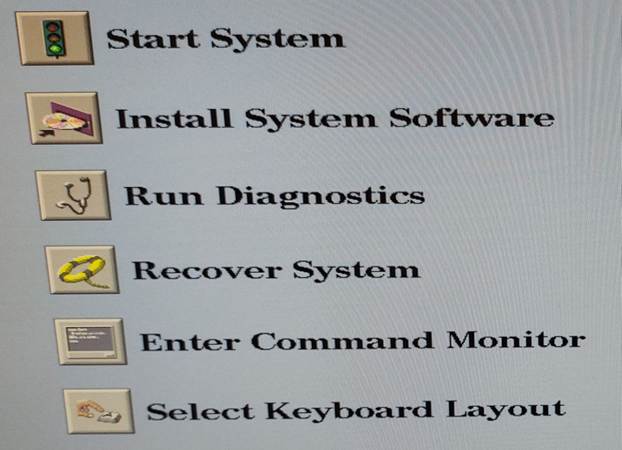
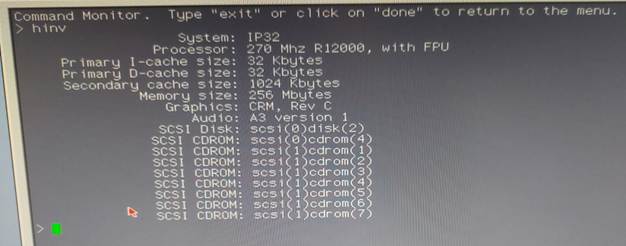
First check, if the 7 virtual drives on SCSI bus 1 have been recognized, by choosing menu entry Enter Command Monitor.
In the command monitor type hinv to show the devices recognized by the system.
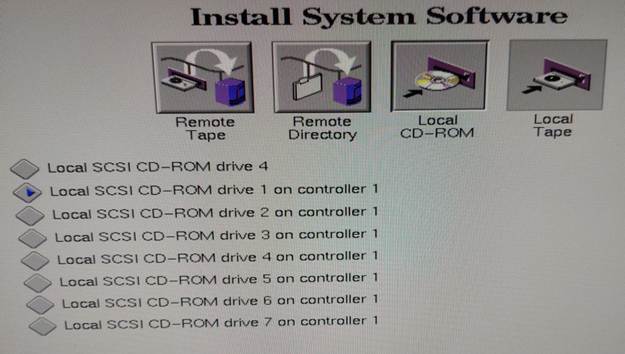
Type exit to go back to the main menu and choose menu entry Install System Software.
As installation device, choose the virtual CD connected to SCSI bus 1 on controller 1, which contains the CD Installation Tools and Overlays (1 of 3) and press button Install.
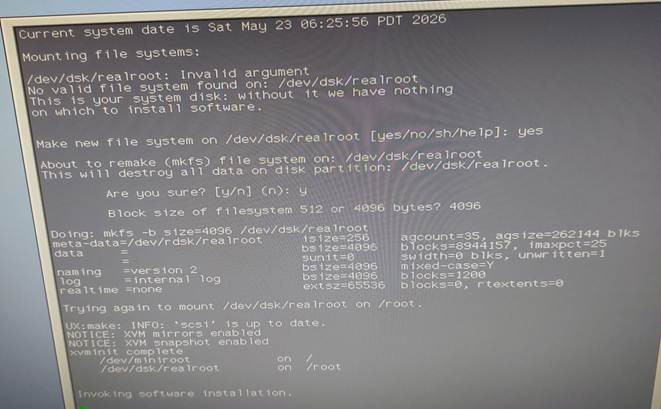
Now the installation tools are copied to disk.

For some time, the following message may appear on the screen, which can be ignored.

If the disk was newly formatted, you will be asked to create a new filesystem.
Answer yes and choose 4096 as block size.
After a short while the inst> prompt appears.
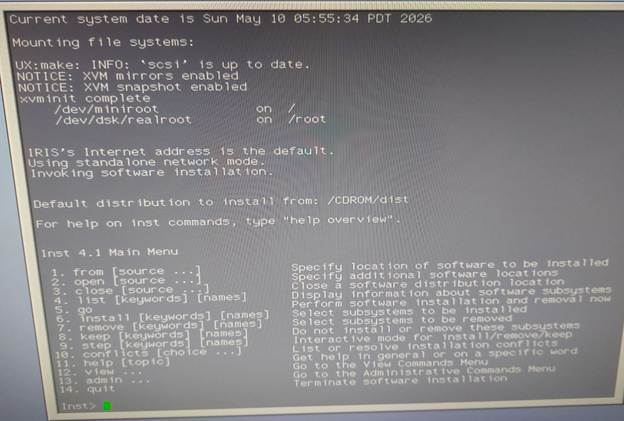
Go into the admin menu and in the admin menu type sh to start a shell.
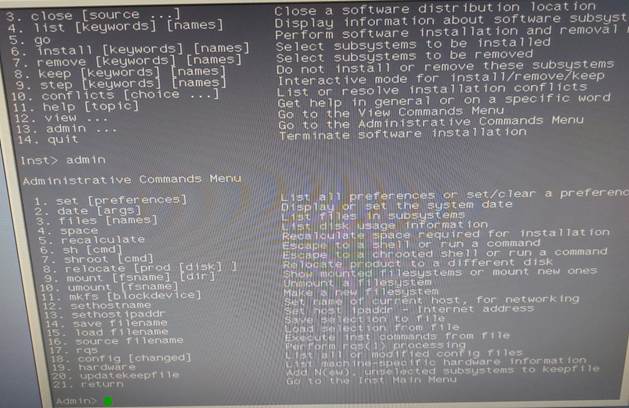
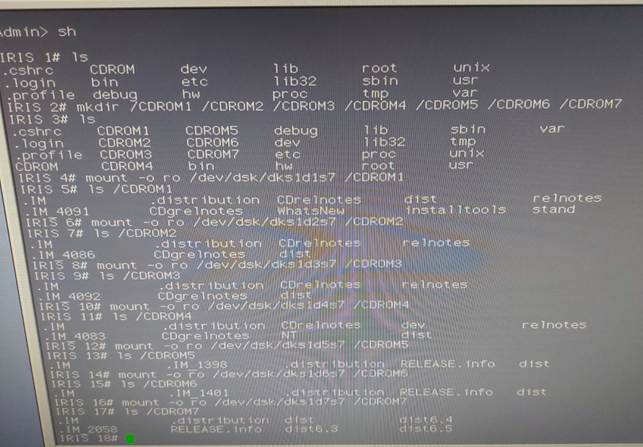
In the shell create 7 directories, which are used as mount points for the virtual CDs:
mkdir /CDROM1 /CDOM2 /CDROM3 /CDROM4 /CDROM5 /CDROM6 /CDROM7
Then mount the 7 CDs:
mount -o ro /dev/dsk/dks1d1s7 /CDROM1
mount -o ro /dev/dsk/dks1d2s7 /CDROM2
mount -o ro /dev/dsk/dks1d3s7 /CDROM3
mount -o ro /dev/dsk/dks1d4s7 /CDROM4
mount -o ro /dev/dsk/dks1d5s7 /CDROM5
mount -o ro /dev/dsk/dks1d6s7 /CDROM6
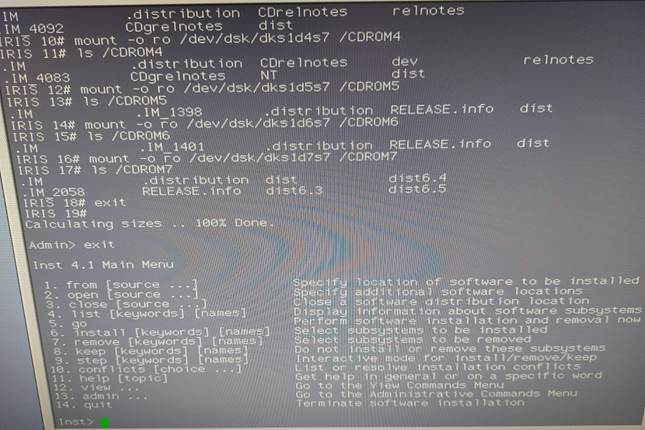
mount -o ro /dev/dsk/dks1d7s7 /CDROM7
Go back from the shell to the admin menu by typing exit.
Then type exit again to go the installer main menu.
Then go into menu from and read in the first CD by typing /CDROM1/dist and hitting the Enter key.
The installer reads the product description, which takes a few seconds.
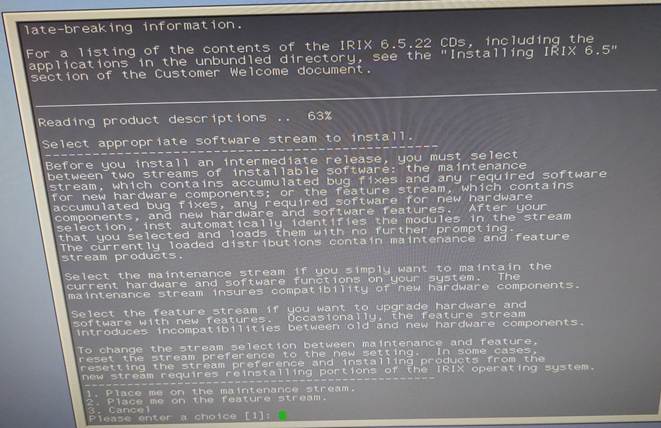
You will be asked, if you want to use maintenance or feature stream. Choose 1, which is the default for maintenance stream.
Repeat reading the product descriptions for /CDROM2/dist until /CDROM7/dist.
Note, that some CDs display release notes.
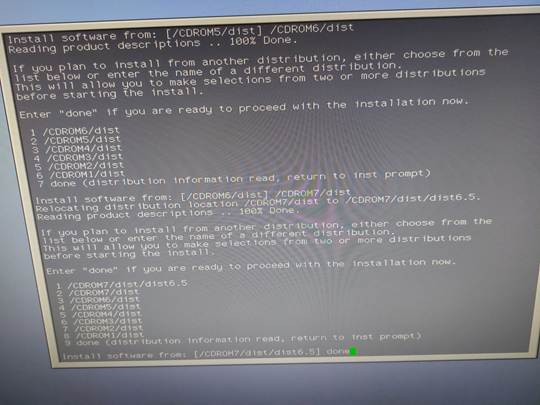
Enter done to go back to the installer main menu.
To start the installation, type the following commands:
keep *
install standard
install prereqs
go
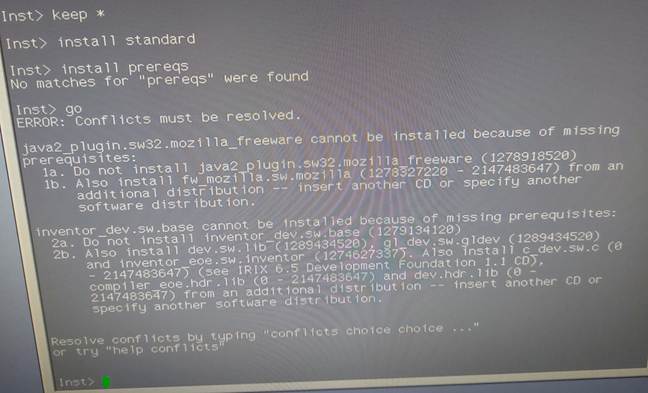
Two conflicts appear regarding missing prerequisites: Java2 plugin and Inventor development package.
I resolved the conflicts by not installing the appropriate packages.
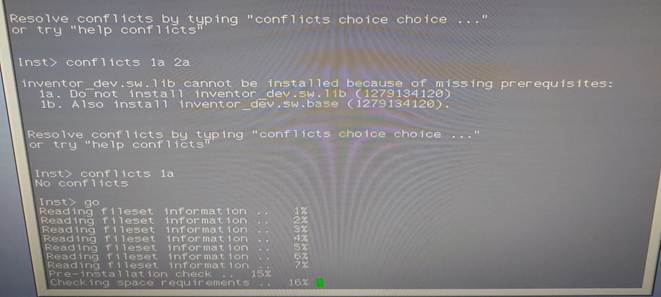
Now type go again and IRIX is installed without having to change CDs. The installation takes approximately 20 minutes.
Type quit to quit the installer and finish the installation.
IRIX is then requickstarting ELF files and finally asks you to restart the operating system. Enter yes.
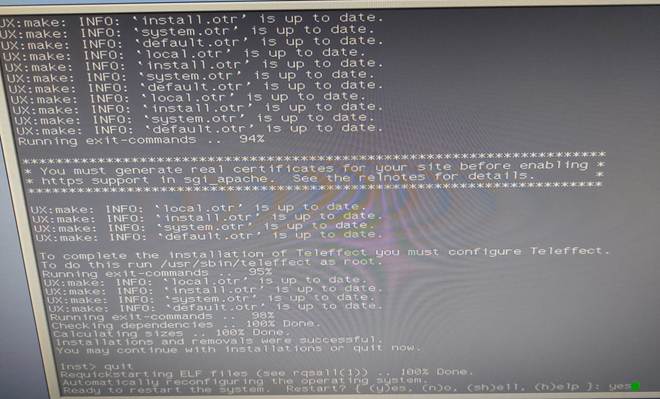
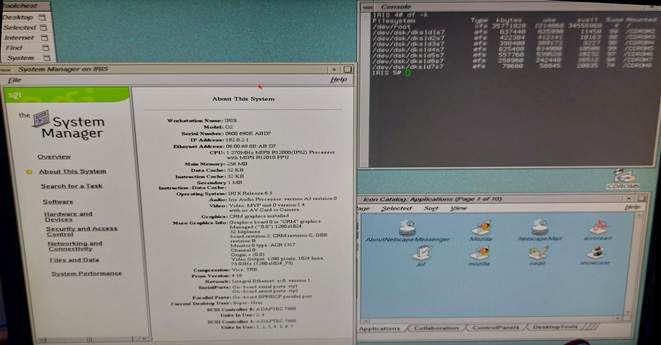
After the restart, a clean IRIX 6.5.22 installation should show the login screen with an empty root password.
Login as root and have fun with IRIX.